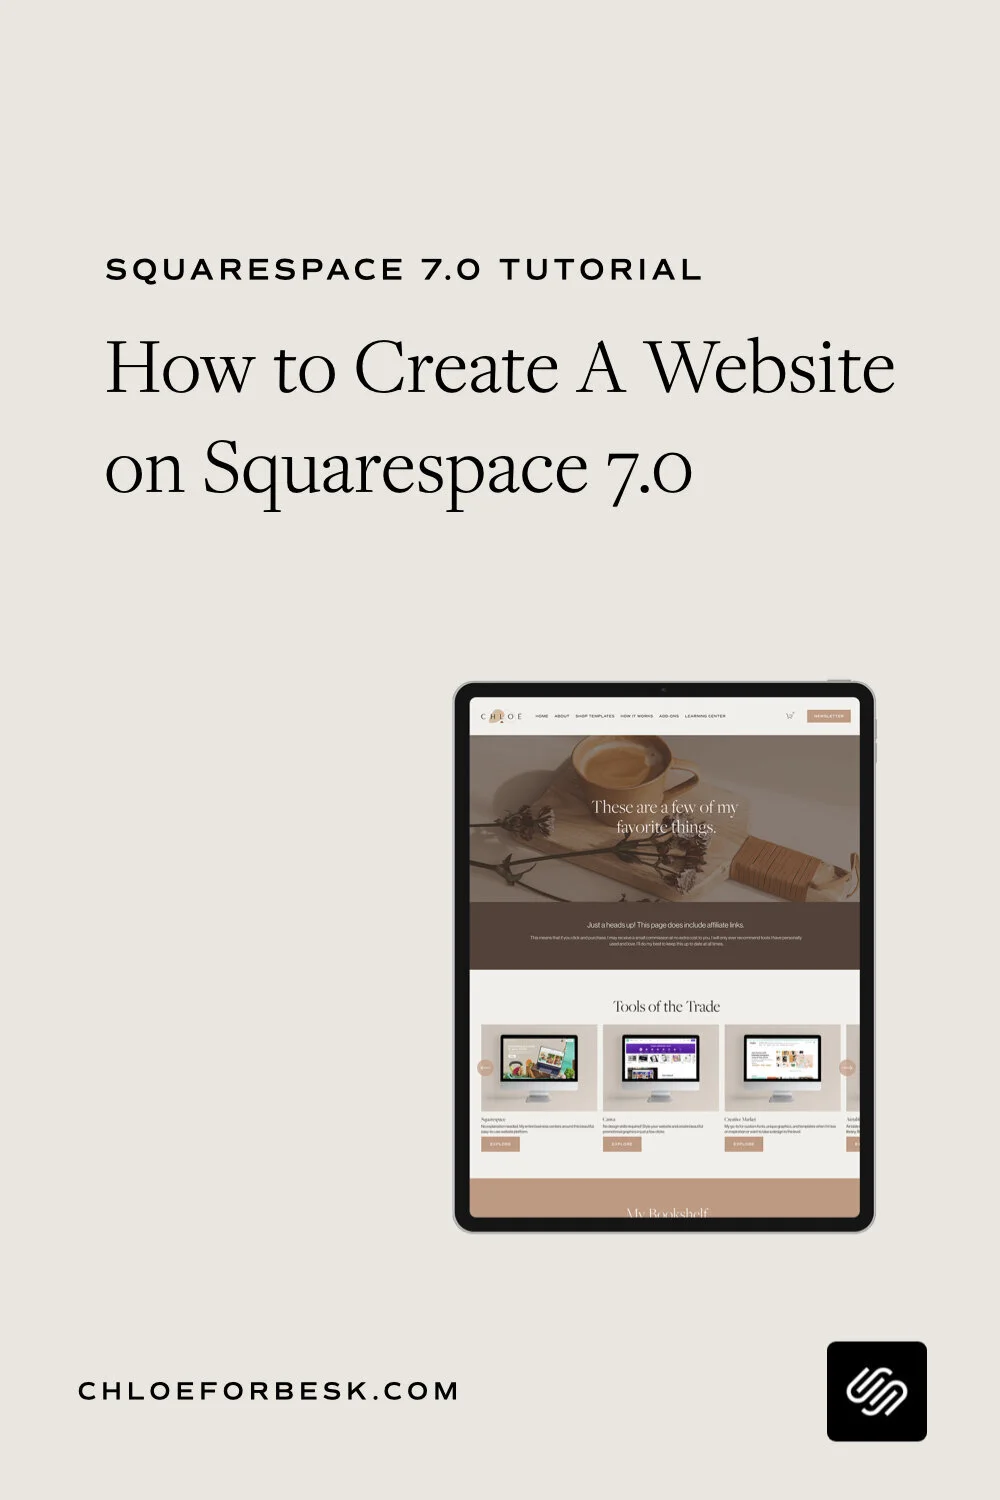
How To Create A Website On Squarespace 7.0 (Brine Template)
Squarespace is an incredible platform for business owners looking to create beautiful, functioning websites quickly. It’s a simple, easy to use, all-in-one solution with a ton of benefits for busy entrepreneurs who simply don’t have the time trying to master Wordpress.
Whether you are looking to switch from another platform or are looking to create a website for the first time, I’ve put together a quick guide on how to set up your Squarespace website in just a few simple steps.
Note: I’ve updated this post to add a video tutorial showing you how to create your own website using the brine template. I hope this will give you everything you need to get started with Squarespace.
01. Plan Your Squarespace Website First
The mistake a lot of business owners make when creating their first site is jumping right into the deep end. It’s great to be proactive but without any strategic thought or intention ahead of time, it’s easy to become overwhelmed. Your website is your shop front, it’s the place you invite customers in and you try to sell them based on the experience they receive before they ever make a purchase.Planning out your branding, website navigation, content and call to actions ahead of time massively helps with the actually set up and design of your website. For this step, I’ve put together a free downloadable guide that will walk you through all the steps you need to take in planning out your website strategically. You can access it by signing up to my email list below.

02. Choose Your Squarespace Template
Once you’ve planned your website out, head on over to Squarespace’s website and begin by selecting ‘Get Started.’

Once you click ‘Get Started’ you’ll be taken to a page where you can answer a couple of questions and Squarespace will recommend templates for you or you can choose to search through the templates yourself. Keep in mind you can easily switch templates at any time.
Squarespace has a huge library of themed templates for you to choose from. These can all be fully customised to your branding and the vision you have for the layout of your site.
There are a few key considerations you will want to keep in mind when selecting your template.
Your Website’s Purpose
Depending on your website purpose, you’ll want to choose a theme that highlights your core purpose whether it be:
A service based site focused on your core call to action
A product based site focused on highlighting your storefront
A content-based site focused on your latest article publications
Imagery
Many Squarespace templates are designed to showcase beautiful imagery; perfect for photographers, designers, and other visual based industries. If full-width galleries with lots of imagery fits your brand, you’ll want to opt for a template that compliments this.
On the other hand, if you like minimal design with white space or are looking for a professional, corporate feel, there are a few specific themes tailored to that.

Parallax Scrolling
Only Squarespace sites with Index pages incorporated allow for parallax scrolling. Parallax scrolling is what you see when a background image moving slower than the content in the foreground.
If this is a feature you’d like to include on your website, it’s important that you choose a template that has this capability. I recommend choose a template from the Brine family.
Don’t stress too much about selecting the right theme your first time. The great thing about Squarespace is that you can easily switch between templates with the click of a button. You can also see a live preview of a new template by installing it so you can play around with a new template before committing to it.
Once you’ve selected the template you’d like to start with, hit ‘start with this’ and your template will be installed on your site.
Initially, you’ll start with demo content. You can either delete this all and start from scratch or you can edit the demo content (recommended) by replacing it with your own words, photos, style etc. This is a good option if you’ve never created a website or are new to the Squarespace platform.
03. Sign Up For A Free Trial
When you decide on a template, click ‘Start with Template’. You can then sign up for an account and add some basic information about your business. All Squarespace website’s come with a 14-day free trial with no credit card required. This will give you some time to familiarise yourself with the platform and begin building your new website.

04. Navigating Your New Squarespace Website
Squarespace is incredibly user-friendly on the backend of your website. You will see a navigation bar to the left hand side of your page.
Pages: Manage all of your website content included web pages, blog posts and your store
Design: Manage the aesthetics of your site such as the fonts, colours and overall feel.
Commerce: Manage your store in terms of inventory, customers and promotional discounts.
Marketing: Integrate your social media integrations, pop ups and email campaigns.
Analytics: View your website’s performance and see how customers are navigating through your site.
Comments: Manage all your blog comments.
Settings: Control the set up and backend of your site such as inputting contact information, SEO, domains, payments and tax etc.
Help: Access Squarespace’s extensive knowledge base and speak to Squarespace support.

To the right of your page, you’ll see a preview of your website and if you look up to the top, you’ll see the option to switch between desktop, tablet and mobile views. This is really useful when it comes to designing your website for mobile. This is a big deal. According Wolfgang Digital’s KPI Report 2019, over 53% of traffic comes from mobile devices.

05. Basic Squarespace Website Set Up
Before jumping into adding the content to your new Squarespace website, go through each of the tabs on your navigation sidebar and add in the basic information about your business. Here’s a few quick tips for getting started.
Add Your Basic Information
Go to Settings > General to add in your business information and connect your social media accounts. You will be able to add these in via a content block on a particular page and/ or in your website navigation menus.
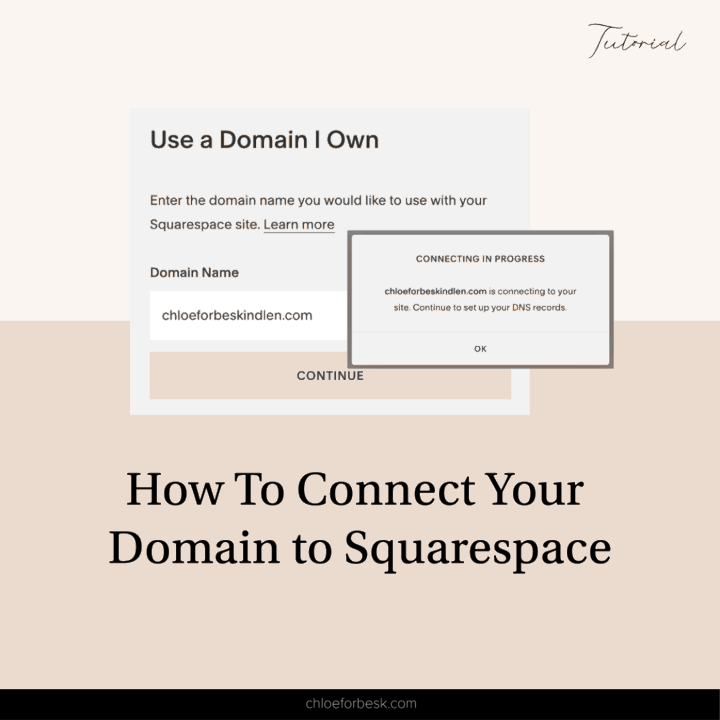
Connect Your Domain To Squarespace
If this is your first time creating a website, you can purchase a domain via Squarespace. Depending on the paid plan you go on to purchase, a free domain may be included.
Alternatively, you can connect your domain via a third-party. To do this go to:
Settings > Domains > Use a domain I own > [type in domain] > Select Third Party Provider > Connect this domain.
You may wish to wait until your site is ready to go live before connecting your domain.
This avoids customers visiting your site while you’re still in the process of creating it. Alternatively, you can connect it but add a lock screen so that when customers visit your site, they will be taken to a landing page.
Set Up Your Email
Now it’s time to create a professional email for your ideal clients to contact you on. To keep things simple, I recommend setting up your email via GSuite, through Squarespace for an additional fee. Settings > Email and Gsuite You can then select a monthly or annual plan. If you plan to pay for your Squarespace site annually, hold off on doing this until you purchase your Squarespace plan. Some plans include one year of Gsuite free.

Set Up Commerce
Commerce is only available on certain Squarespace plans. If you have a store or are planning to sell products and/or services on your website, under Commerce, click Payments and connect your payment processor. At present, you can choose between Stripe and Paypal.
If you don’t require commerce support, you can still promote your services on the basic plan by adding a simple paypal checkout link to your products/services.
Add Your Search Engine Description
Under Marketing > SEO, be sure to include your search engine description so that you don't forget. Take time to do keyword research and carefully craft your website SEO description accordingly.
I like to search YouTube. It's free, simple and it's the second largest search engine in the world, owned by Google, the largest search engine in the world. I start by typing a few words relevant to what I do and look at what it suggests. These are highly searched terms, terms you want to be found for.
Add Your Cookie Banner
Under Settings > Website, you'll see an option for 'Cookies & Visitor Data'. Turning this on initially will ensure you are covered from a legal standpoint.
Squarespace's default cookie banner isn't the prettiest. As you get more comfortable with the platform, you might want to customize it.
Here are a couple of great tutorials from fellow Squarespace bloggers that you might find helpful.
Kerstin Martin: How to Customize your Squarespace Cookie Banner
Heather Tovey: How to Customize the Squarespace Cookie Banner
Add Your Logo And Favicon
You can add your logo and favicon under your Design settings.
Include the name of your site, your tagline, upload your logo and add your favicon.
If you don’t have a logo, you can always create a simple one in a tool like Adobe Photoshop, Canva or Picmonkey.
Always ensure you use a high-quality logo to avoid it looking pixelated and upload on a transparent background so that it will work with whatever background colors you go onto use.
Underneath, you’ll see an option to add a favicon. This is the little image that appears in browser windows when people are viewing your site.
Once you’ve completed this step, hit save.

These are the basic steps in setting up your website. Now you can start building out your webpages and design. The great thing about Squarespace is that for the most part, everything is self-explanatory.
06. Add Your Website Content
Now it’s time to add your content. To do this, click Pages on the navigation bar.
You can either add your own pages from scratch by clicking the little ‘+’ icon and choosing your page type or you can click on the demo pages and use them as a base to get started. You can just edit the words, content blocks and move things around as you wish.

Squarespace's knowledge base covers all the ins and outs of creating and editing your website content. You can also access tips in the Build Your Own Website Guide I created for you.
07. Style Your Website
Now it’s time to polish your new website up ensuring that it is fully brand cohesive. It’s really important that all aspects of your branding align. Not only does it help people instantly identify you, it’s that consistent element that builds trust.
On Squarespace, you can customise the spacing layout, fonts, colours, backgrounds, elements such as buttons and blog posts. Almost everything can be customised to your brand.
You can do this under the Design tab then Style Editor.
You can go through everything step-by-step. It can be a good idea to click on the elements you’d like to adjust. This way you can visually see the element you are customising.
08. Make Your Website Live
It’s now time to go live with your new Squarespace website. If you haven’t connected your domain already be sure to do that first.
Go to Settings > Billing & Account and select the plan that’s right for you.
Don’t worry if you change your mind later on, Squarespace makes it really easy to upgrade, downgrade and switch between plans at any point in time.

09. Keep It Growing!
Your website will forever be a work in progress, growing and adapting as your business evolves. Luckily, Squarespace can grow with you.
Be sure to post content frequently and use your site to always be improving your customer’s experience. It’s those little changes that make a big difference, especially in the long term.
This guided Squarespace overview was designed to give an overview and a basic guide to getting started with Squarespace. The platform has so much more to offer.
If there is anything I haven’t covered or you have a question regarding Squarespace, let me know in the comments below. I’d be delighted to help.
I hope you found this video valuable. If you did, subscribe for more good vibes or leave a comment below. I’ll see you there! :)